Since usage-based charges can be calculated at the end of the billing period, you often need to wait to collect payments. With prepaid credits, you can now unlock recurring revenue opportunities for pay-as-you-go pricing models.
Prepaid credits increase predictability as they allow you to collect payments in advance and then monitor the evolution of the balance of your customer’s wallets.
You can create up to 5 active wallets per customer, each with its own settings. A wallet can be scoped to specific fees or billable metrics, include usage limitations, and define its own recurring top-up rules.When a subscription or progressive billing invoice is generated, Lago automatically applies available wallet credits to reduce the invoice total.You control the order in which wallets are applied using wallet priority, from 1 to 50 — where 1 is applied first and 50 last. This ensures credits are consumed exactly as intended.
Dashboard
API
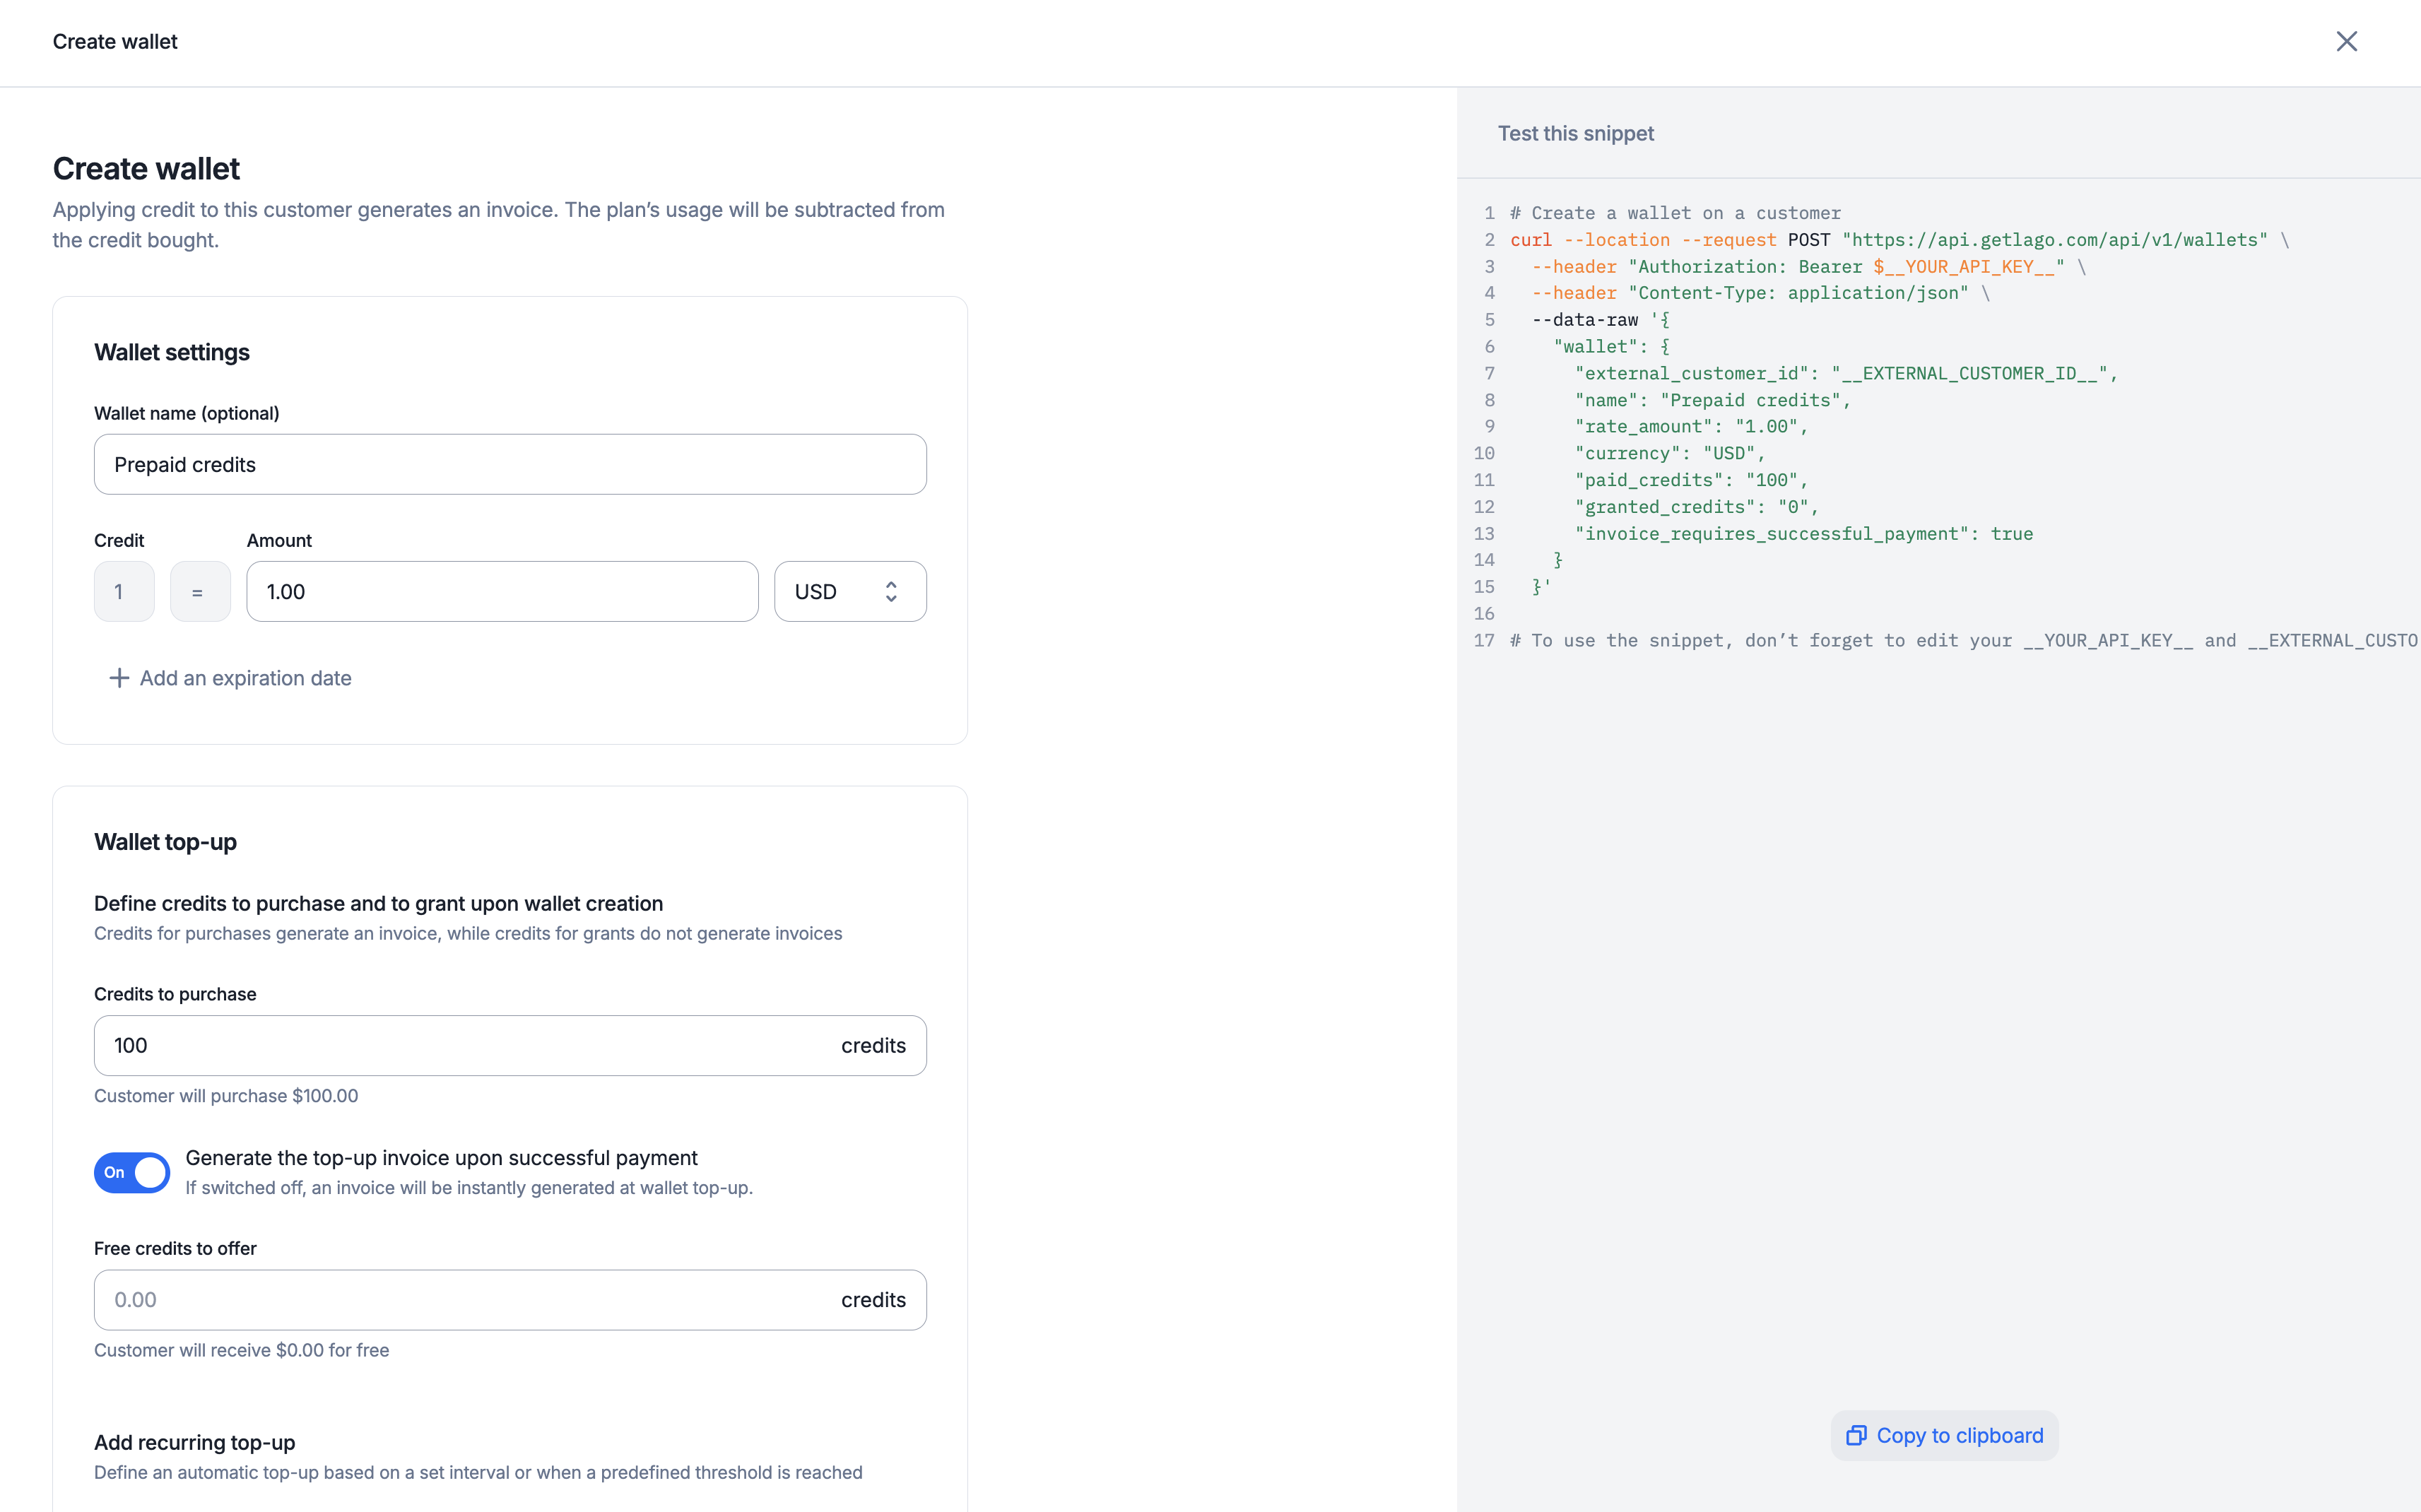
To create a wallet for one of your customers through the user interface:
Access the “Customers” section via the side menu;
Select a customer from the list;
Open the “Wallets” and click “Add a wallet & credits” on the right;
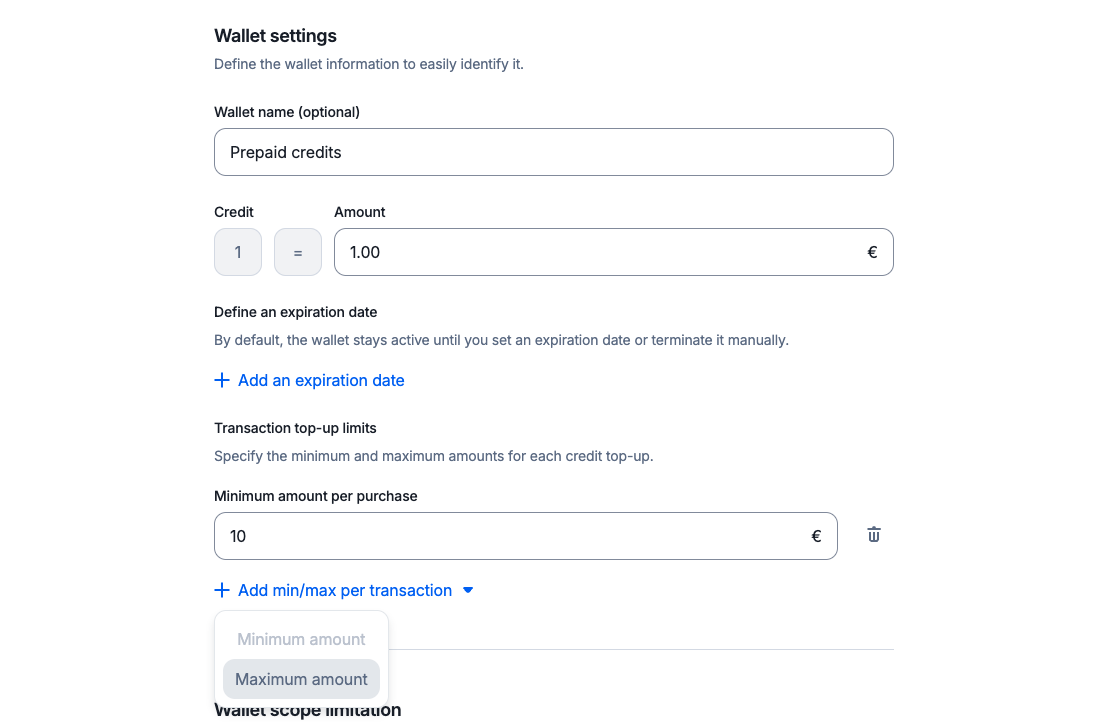
Choose a name for the wallet (optional);
Set the credit value (e.g. 1 credit = $5);
Define the wallet priority;
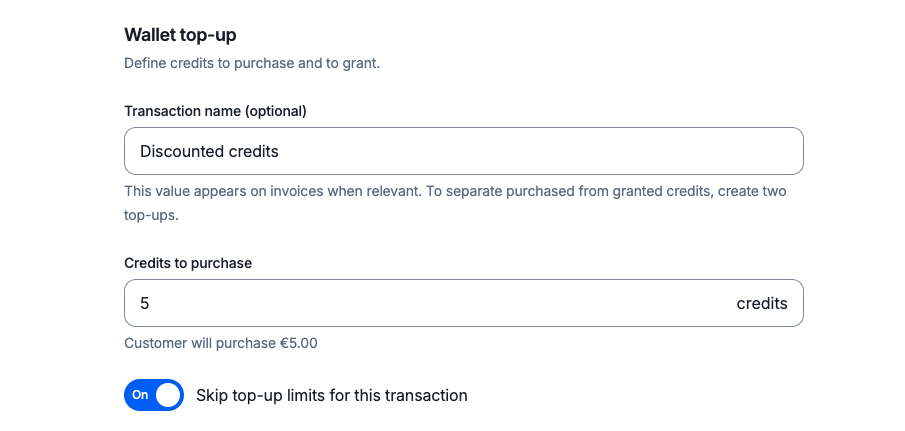
Enter the number of credits to be purchased and/or granted for free;
Define transaction metadata (optional & available only via API);
Determine whether the wallet transaction generates an invoice after a top-up or only following a successful payment;
The currency of the wallet can differ from the default currency of the customer.
Prepaid credits only apply to invoices sharing the same currency as the wallet.
Free credits are added to the customer’s wallet instantly, while purchased
credits are added to the wallet when payment is confirmed (see below).Each customer can only have one active wallet.
PREMIUM FEATURE ✨This feature is only available to users with a premium license. Please
contact us to get access to Lago Cloud and Lago
Self-Hosted Premium.
Keep track of your wallet’s real-time balance. Lago provides two types of balances for your wallet:
Balance: invoiced balance, which reflects the remaining prepaid credits in your wallet. It updates each time an invoice is finalized for the customer.
Ongoing Balance: balance accounted for current usage, including taxes and draft invoices offering a real-time estimate of your balance’s consumption. It refreshes every minute, or whenever an invoice is finalized for the customer.
Prepaid credits settled in a wallet are applied to upcoming subscription invoices. They are deducted from the post-tax subtotal, after any credit notes have been applied.
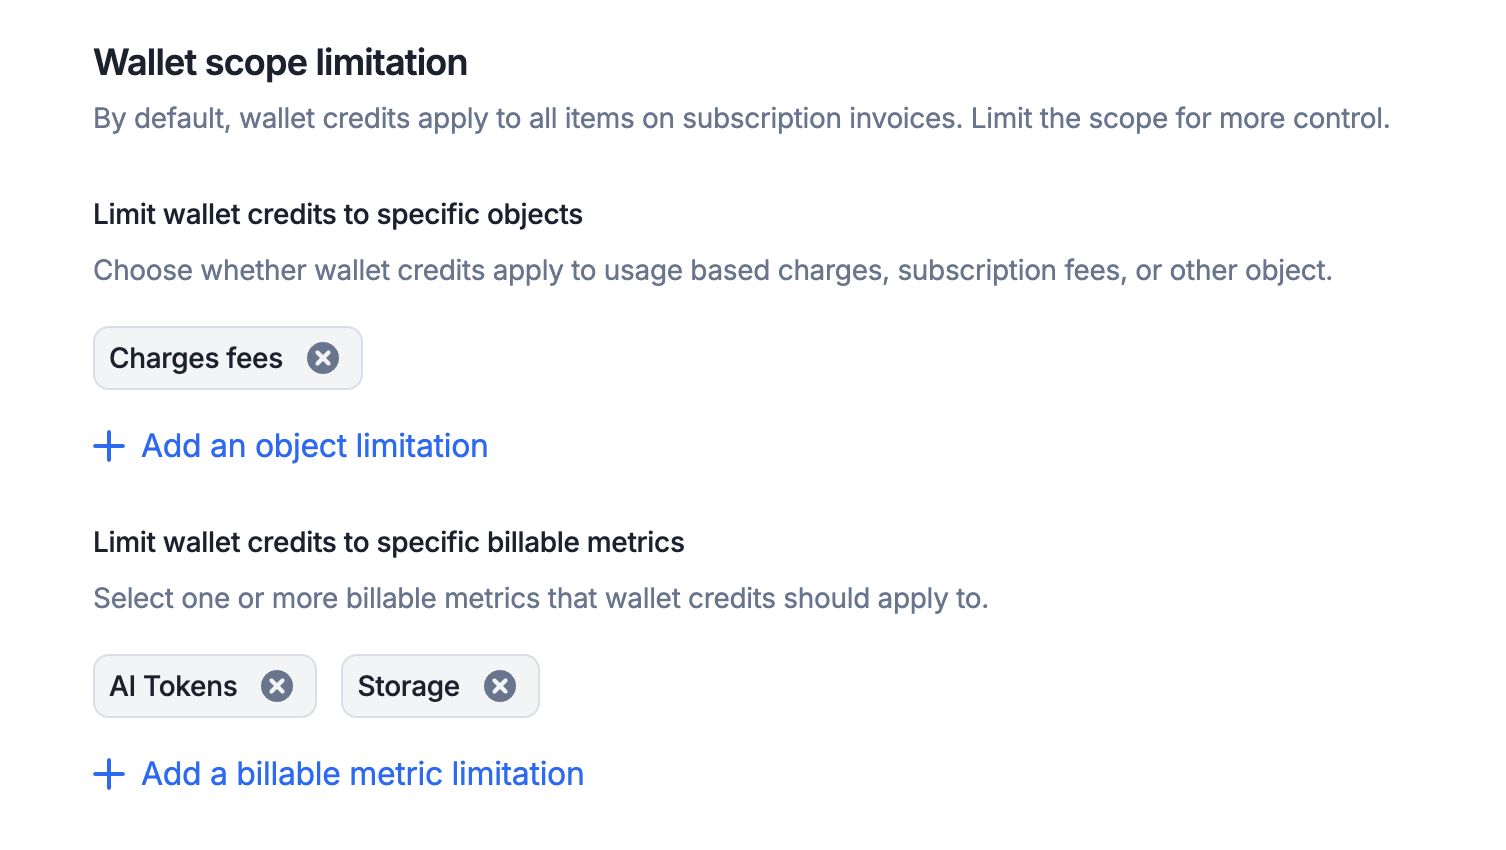
By default, prepaid credits apply to all fee types—subscriptions, charges, and commitments. You can refine this behavior by configuring limitation rules directly in the wallet.
Dashboard
API
To limit the scope of prepaid credits through the user interface:
Create or edit an existing wallet;
In the “Limit wallet credits to specific object” section, add one or more object limitations;
You can also limit wallet prepaid credits to specific billable metrics; and
Keep in mind: selecting all items has the same effect as selecting none. For this reason, we recommend leaving all options unselected unless a specific restriction is needed.
When enabled, this option delays issuing an invoice for a wallet top-up until a successful payment is made. If disabled, the invoice is issued immediately upon the wallet top-up, regardless of the payment status. This setting applies to all transactions for the wallet, but can be overridden for individual transactions or recurring rules.
For each wallet, you can set minimum and maximum limits per paid transaction.
When these limits are defined, any top-up attempt must fall within the specified range—transactions below the minimum or above the maximum will be rejected.
For a single transaction, you can ignore wallet limits at any time by adding the ignore_paid_top_up_limits flag to the payload, or by enabling the Skip top-up limits for this transaction option in the UI.
This applies to both single transactions and automatic top-ups (recurring wallet transactions).
By default, if you don’t set an expiration date, prepaid credits are carried
over to the next billing period until the wallet balance is zero.If you define an expiration date, when the date is reached, all remaining
credits are automatically voided.To modify the expiration date of the prepaid credits through the user interface:
Open the “Wallets” tab and click “Edit wallet” on the right;
Select “Edit information”;
Modify the expiration date; and
Click “Edit information” to confirm.
The expiration date displayed in the app is based on the organization’s timezone.You also have the ability to terminate a wallet manually, before its expiration
date:
Open the “Wallets” tab and click “Edit wallet” on the right;
Select “Terminate wallet”; and
Click again to confirm.
Terminating a wallet will instantly void all remaining credits. This action
cannot be undone.