Create and update a customer
- Dashboard
- API
To create a customer through the user interface:
- Access the “Customers” section via the side menu;
- In the upper right corner, click “Add a customer”;
- Enter the customer’s name and external ID (i.e. unique ID as defined in your backend system);
- Select the customer’s timezone (optional - learn more);
- Enter the customer’s billing information, including company information and address (optional);
- Select the default payment provider for this customer (optional - learn more; and
- Click “Create customer” to confirm.
Companies vs Individuals
When creating or updating a customer, you can specify whether the customer is acompany or an individual by setting the customer type.
By default, if no customer type is specified, the customer will be created without a defined type, and you will need to assign one manually.
Assign objects to a customer
The usage monitoring and billing processes start when you assign a plan to a customer, which triggers a subscription. You can also apply coupons, one-off invoices and prepaid credits to a customer account. To assign objects to a customer through the user interface:- Access the “Customers” section via the side menu;
- Select a customer from the list;
- In the upper right corner of the customer view, click “Actions”; and
- Select an action from the dropdown list.
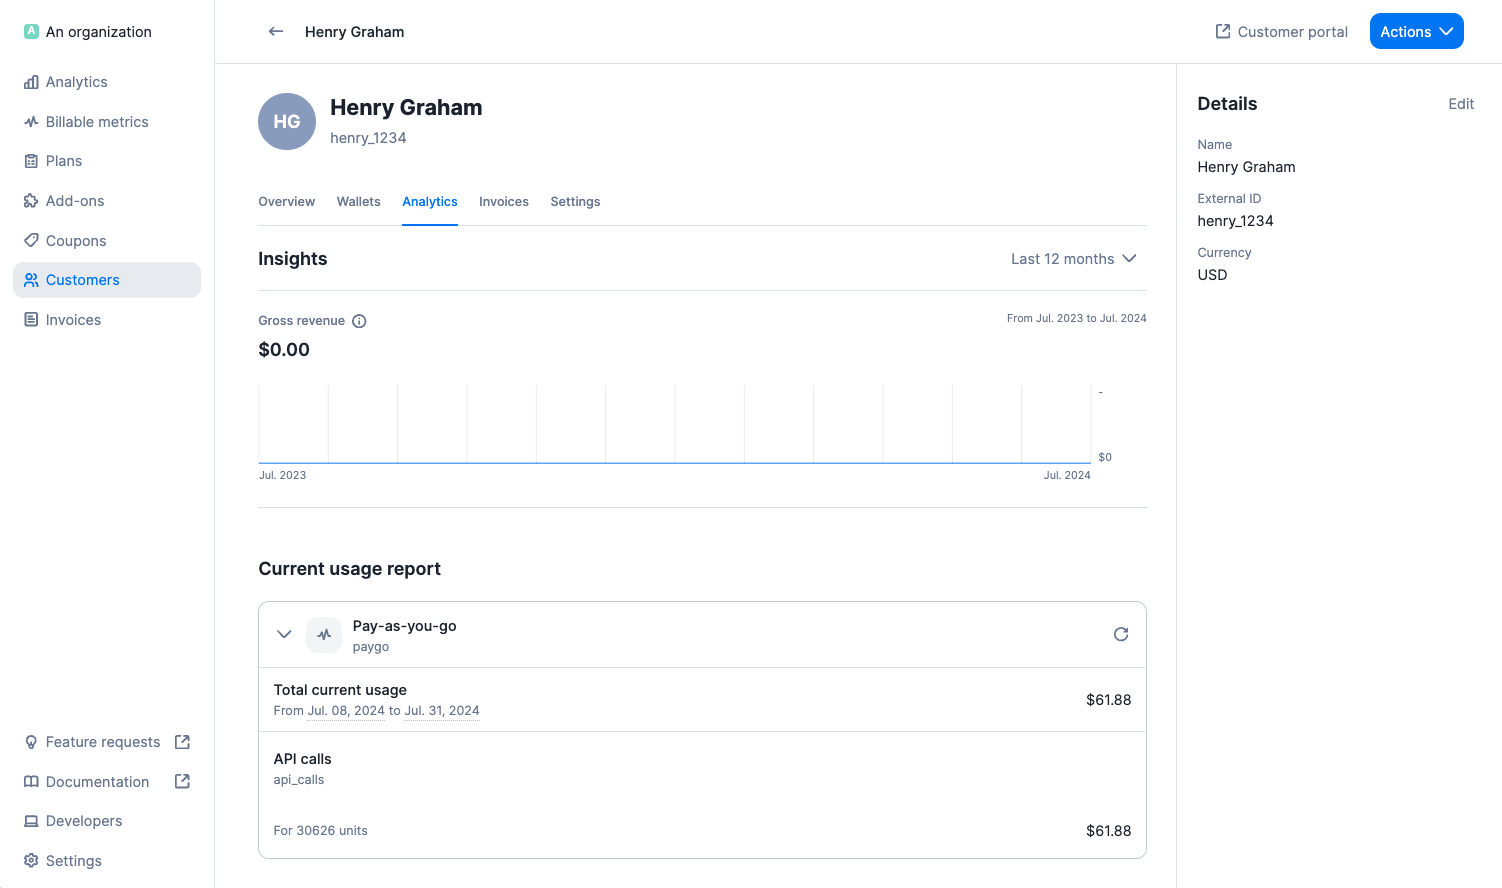
Monitor the customer’s current usage
When a plan that includes usage-based charges is assigned to a customer, you can start pushing events associated with the customer account. During the billing period, the customer’s current usage is visible in the “Analytics” tab of the customer view, under “Current usage report including (but not limited to):- Total amount for the period under consideration; and
- Breakdown by charge, including total number of billing units and amount.
- Dashboard
- API

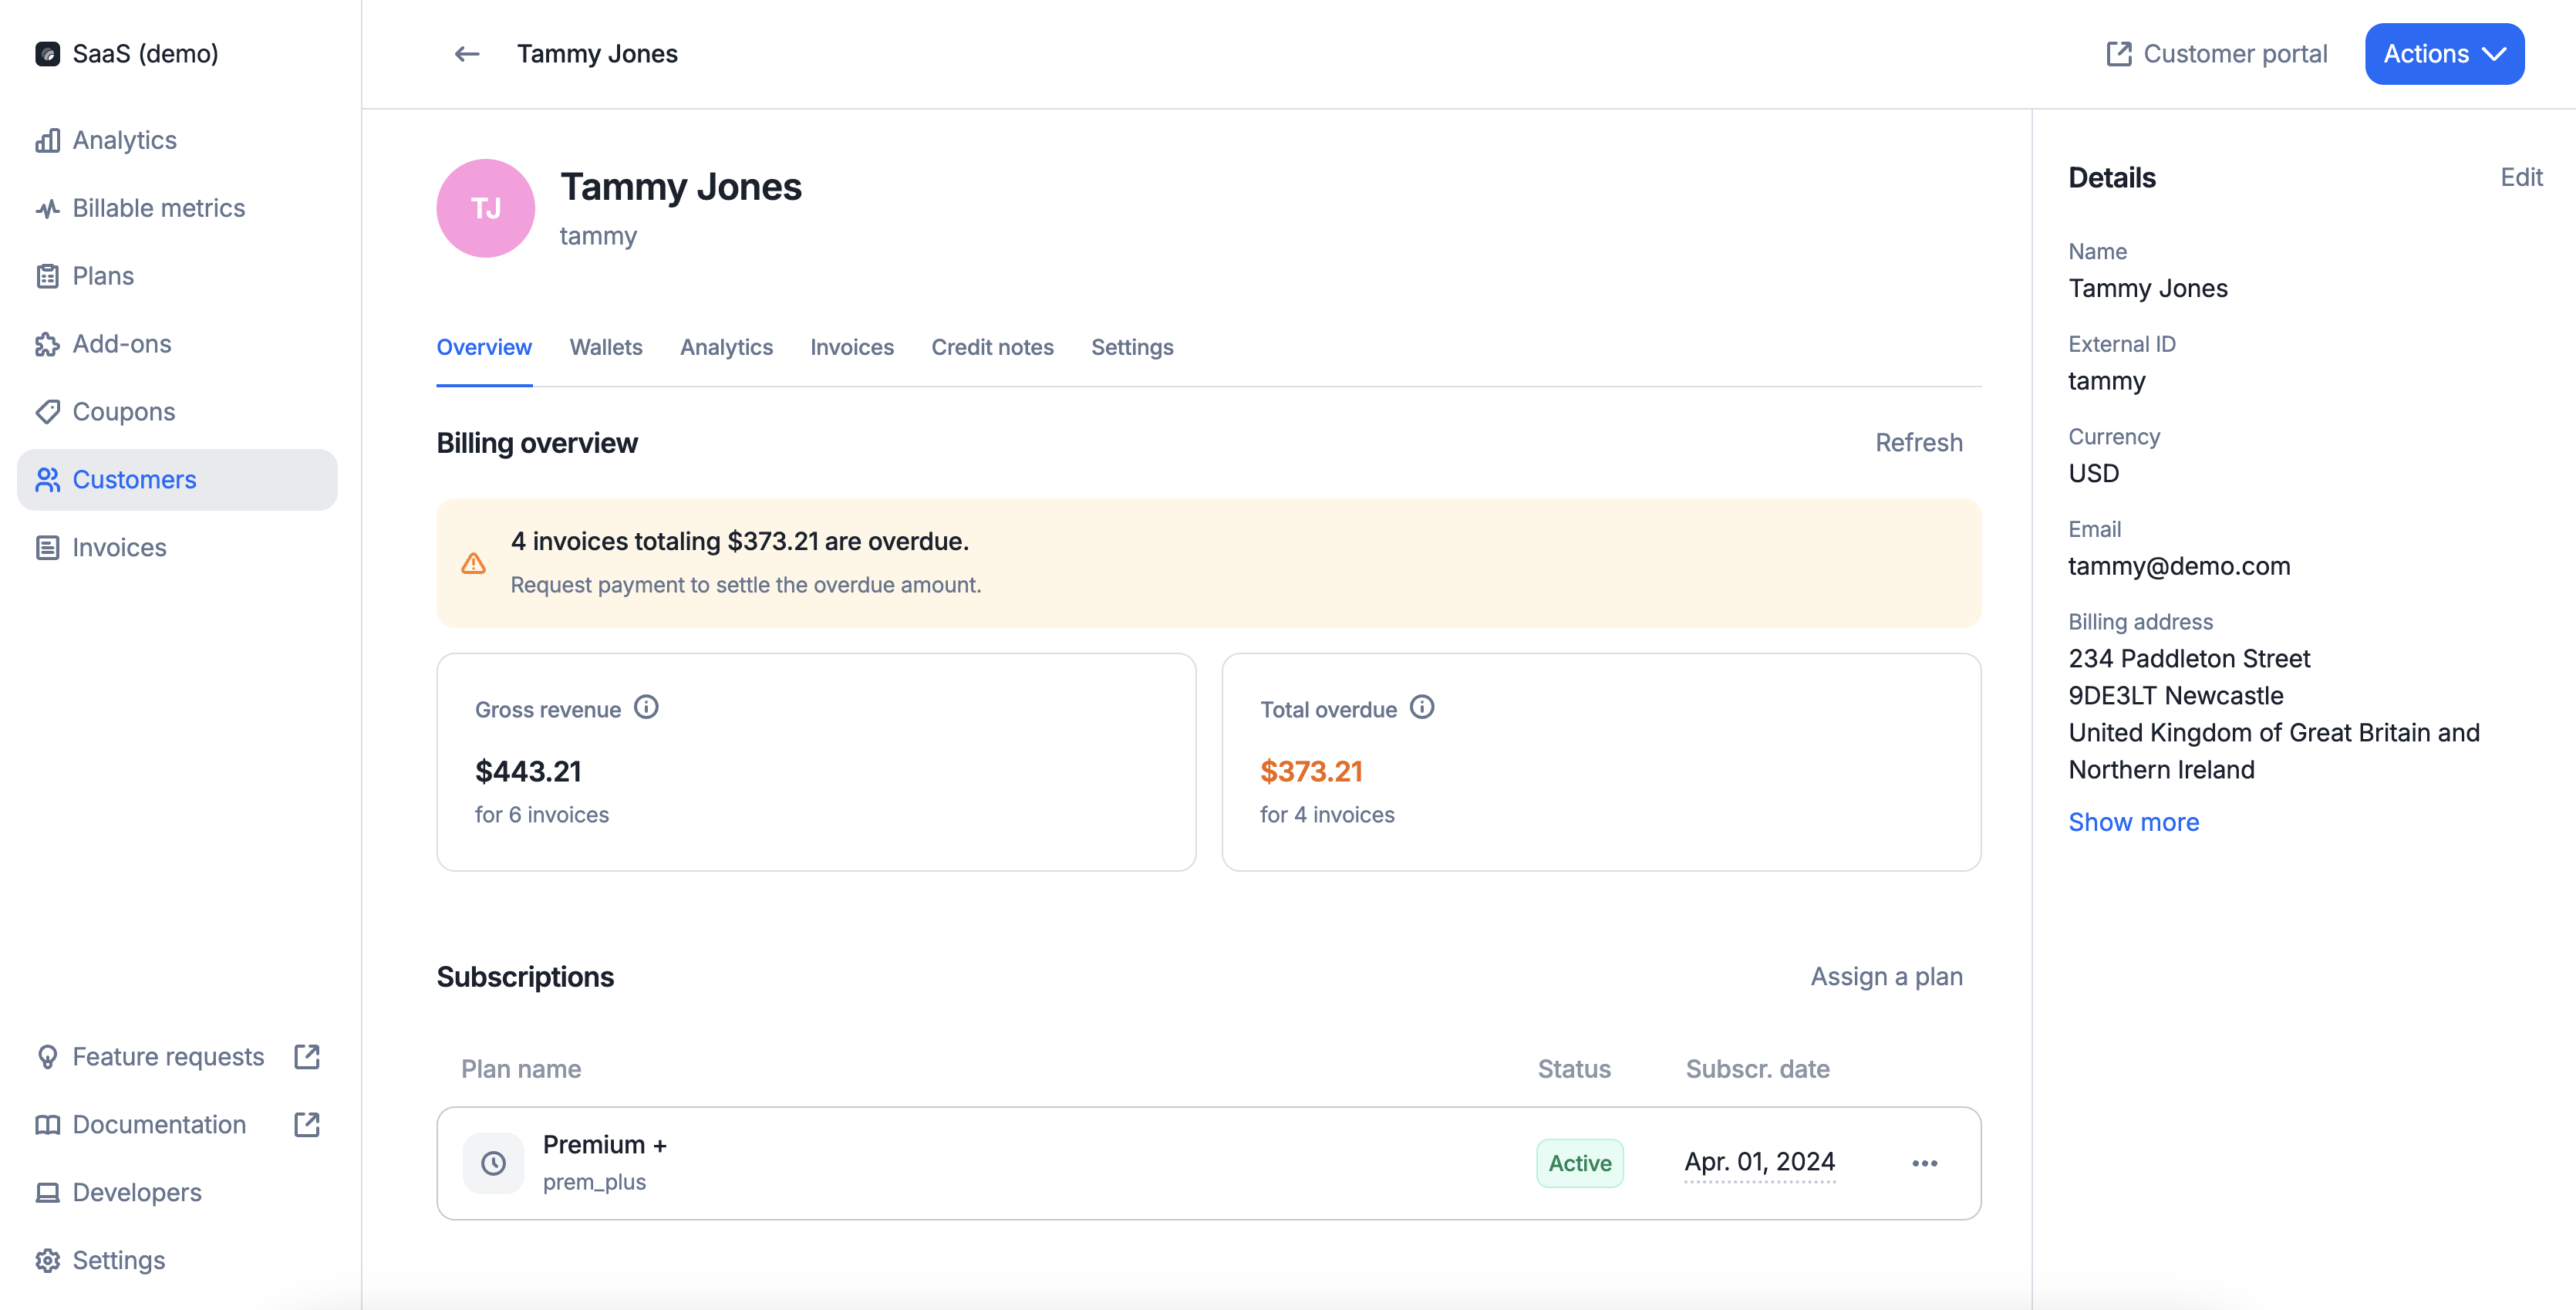
Monitor the customer’s billing status
The “Billing overview” lets you see in a glance where a customer stands in terms of revenue and collection. It takes into account invoices since the customer’s creation date.- Gross revenue indicates how much has been billed to this customer
- Total overdue highlights the aggregated amount from invoices that are past due
- Dashboard
- API

Deleting a customer
You may delete a customer linked to existing objects (i.e. applied coupons, wallets, subscriptions, add-ons). If you do so:- All subscriptions associated with this customer account will be immediately terminated (this action may trigger the generation of invoices and/or credit notes);
- All coupons applied to this customer account will be immeditely terminated;
- The customer’s active wallet will be immediately terminated and all remaining credits will be voided; and
- All
draftinvoices associated with this customer account will be immediately finalized.
finalized invoices and credit notes associated with the deleted customer remain available in the “Invoices” section of the user interface and can also be retrieved via the API.
It is possible to generate new credit notes and process refunds after the deletion of the customer.
After deleting a customer account, you can create a new one using the same
external_id.